This week I
decided to make a masculine Christmas card for you all,
I’m not sure
about everyone else but I really struggle to make masculine cards.
So to make
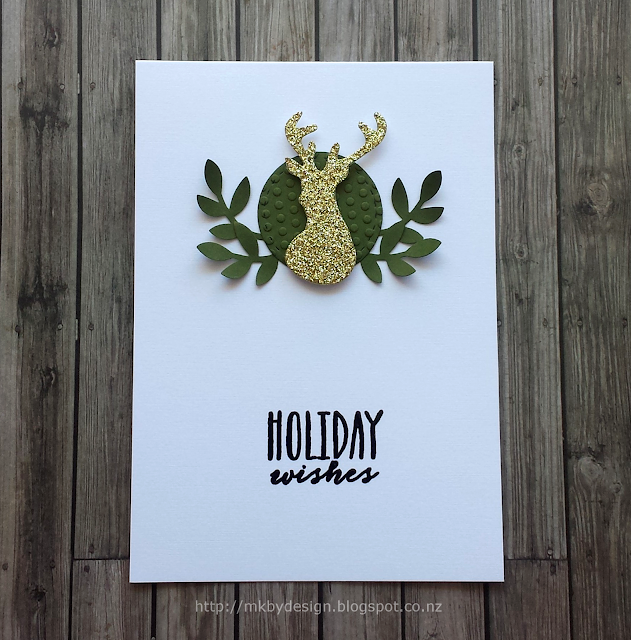
it easier on myself I used the same Wplus9 Stag Trio die set from last week, I decided to
go with the stag head and a half wreath sort of look, keeping my card design clean
and simple and just letting the stag element really stand out and do all the
work for me.
I started
off again by using my We R Memory Keepers Trim & Score Board to trim down
my favourite cardstock, making an A2 top folding card out of Trophee Board
White Linen 240 GSM Paper.
I also
decided to use the same sentiment as last week, mainly just because it my
favourite at the moment but also because it’s not too fancy and helps keep my
masculine card looking nice and “manly”.
I heat
embossed the Hero Arts Holiday Tree sentiment using Rangers Super Fine
Black Embossing Powder, I also heat embossed the same sentiment
to the back flap of a C6 envelope, I just like doing this as I think it looks better than a plain old envelope, plus it then matches the card.
Moving onto
the die cutting, I took the stag head from the Stag Trio die set and die cut him out using Stampin’ Up! Gold
Glimmer Paper, this paper is super sparkly and makes the stag head really pop off the card
front.
Next I die
cut a circle that wasn’t quite as big as my stag head using Mossy Meadow
cardstock and Lil' Inker Designs Stitched Mat Circles, using the second smallest
die to make the circle. Since I was keeping my card pretty simple with a lot of
white area I wanted to add a bit more texture to the card so I dry embossed the
circle
using a small spotted embossing folder from
Lifestyle Crafts.
To make the half wreath I used the Bird Builder Punch from Stampin’ Up!, punching
out just the leaves / branches using Mossy Meadow cardstock, using my scissors I then trimmed down the branch ends so they weren’t so long.
To assemble
the stag element before placing it onto my card I first ran a bit of Tombow
Removable Adhesive Tape to the back of the die cut circle, I then placed my
leaves out and very carefully pressed them in place, because this adhesive
allows for removal and repositioning I then placed a bit of tape over the ends
just so they didn’t move.
With the
leaves firmly in place I then used my bone folder and curled up the ends of the
leaves, this just gave them some more texture and also made them look like they
weren’t just sitting there flat against the card.
I then used
Tombow Mono Multipurpose Liquid Glue to adhere the circle to the card front,
lastly I popped the stag head up on Small Foam Dots and placed him neatly in
the centre of the circle.
That’s my
card wrapped up for today, hope you liked it.
Have a lovely weekend and as always, thanks for reading.
- SUPPLY
LIST -
Stampin’ up!
Heat Tool
Bird Builder
Punch
Gold Glimmer
Paper
Whisper
White - C6 Envelopes
Mossy Meadow
A4 Cardstock
Tombow MONO
- Multipurpose Liquid Glue
.
Simon Says Stamp
Versamark -
Ink Pad
EK Success -
Cutter Bee Scissors
EK Success -
Powder Tool Applicator
We R Memory Keepers -
Trim & Score Board
Tombow - Removable
Adhesive Tape Runner
Ranger -
Embossing Powder Super Fine Black
Lifestyle
Crafts - Spotted Embossing Folder Set
Best
Creation - Small Circles 3D Foam Tape Dots
Hero Arts -
Holiday Tree - Coordinating Stamp And Die Set
.
Lil' Inker
Designs
Stitched
Mats - Circles
.
WPLUS9
Wplus9 -
Stag Trio Designer Dies
.
OTHER
Trophee Board - White Linen 240 GSM Paper


No comments